
DIY Closet Turned Dry Bar

Check out our YouTube Video HERE


While we definitely still have some unpacked boxes pushed into storage, we’re basically unpacked and we’ve officially got our first (big) house project done! As soon as we knew which house we’d be coming home to Florida to, we plotted and planned our “dream” projects and ideas. In our last apartment, we had an additional room we used as a home office - a request of Cara’s. Going in to this new home we really wanted to prioritize Cody having a space that was “his”. With all the man-cave options, (thankfully) he opted for a movie room. Once that was decided, we got to looking at inspo, planning and sourcing.
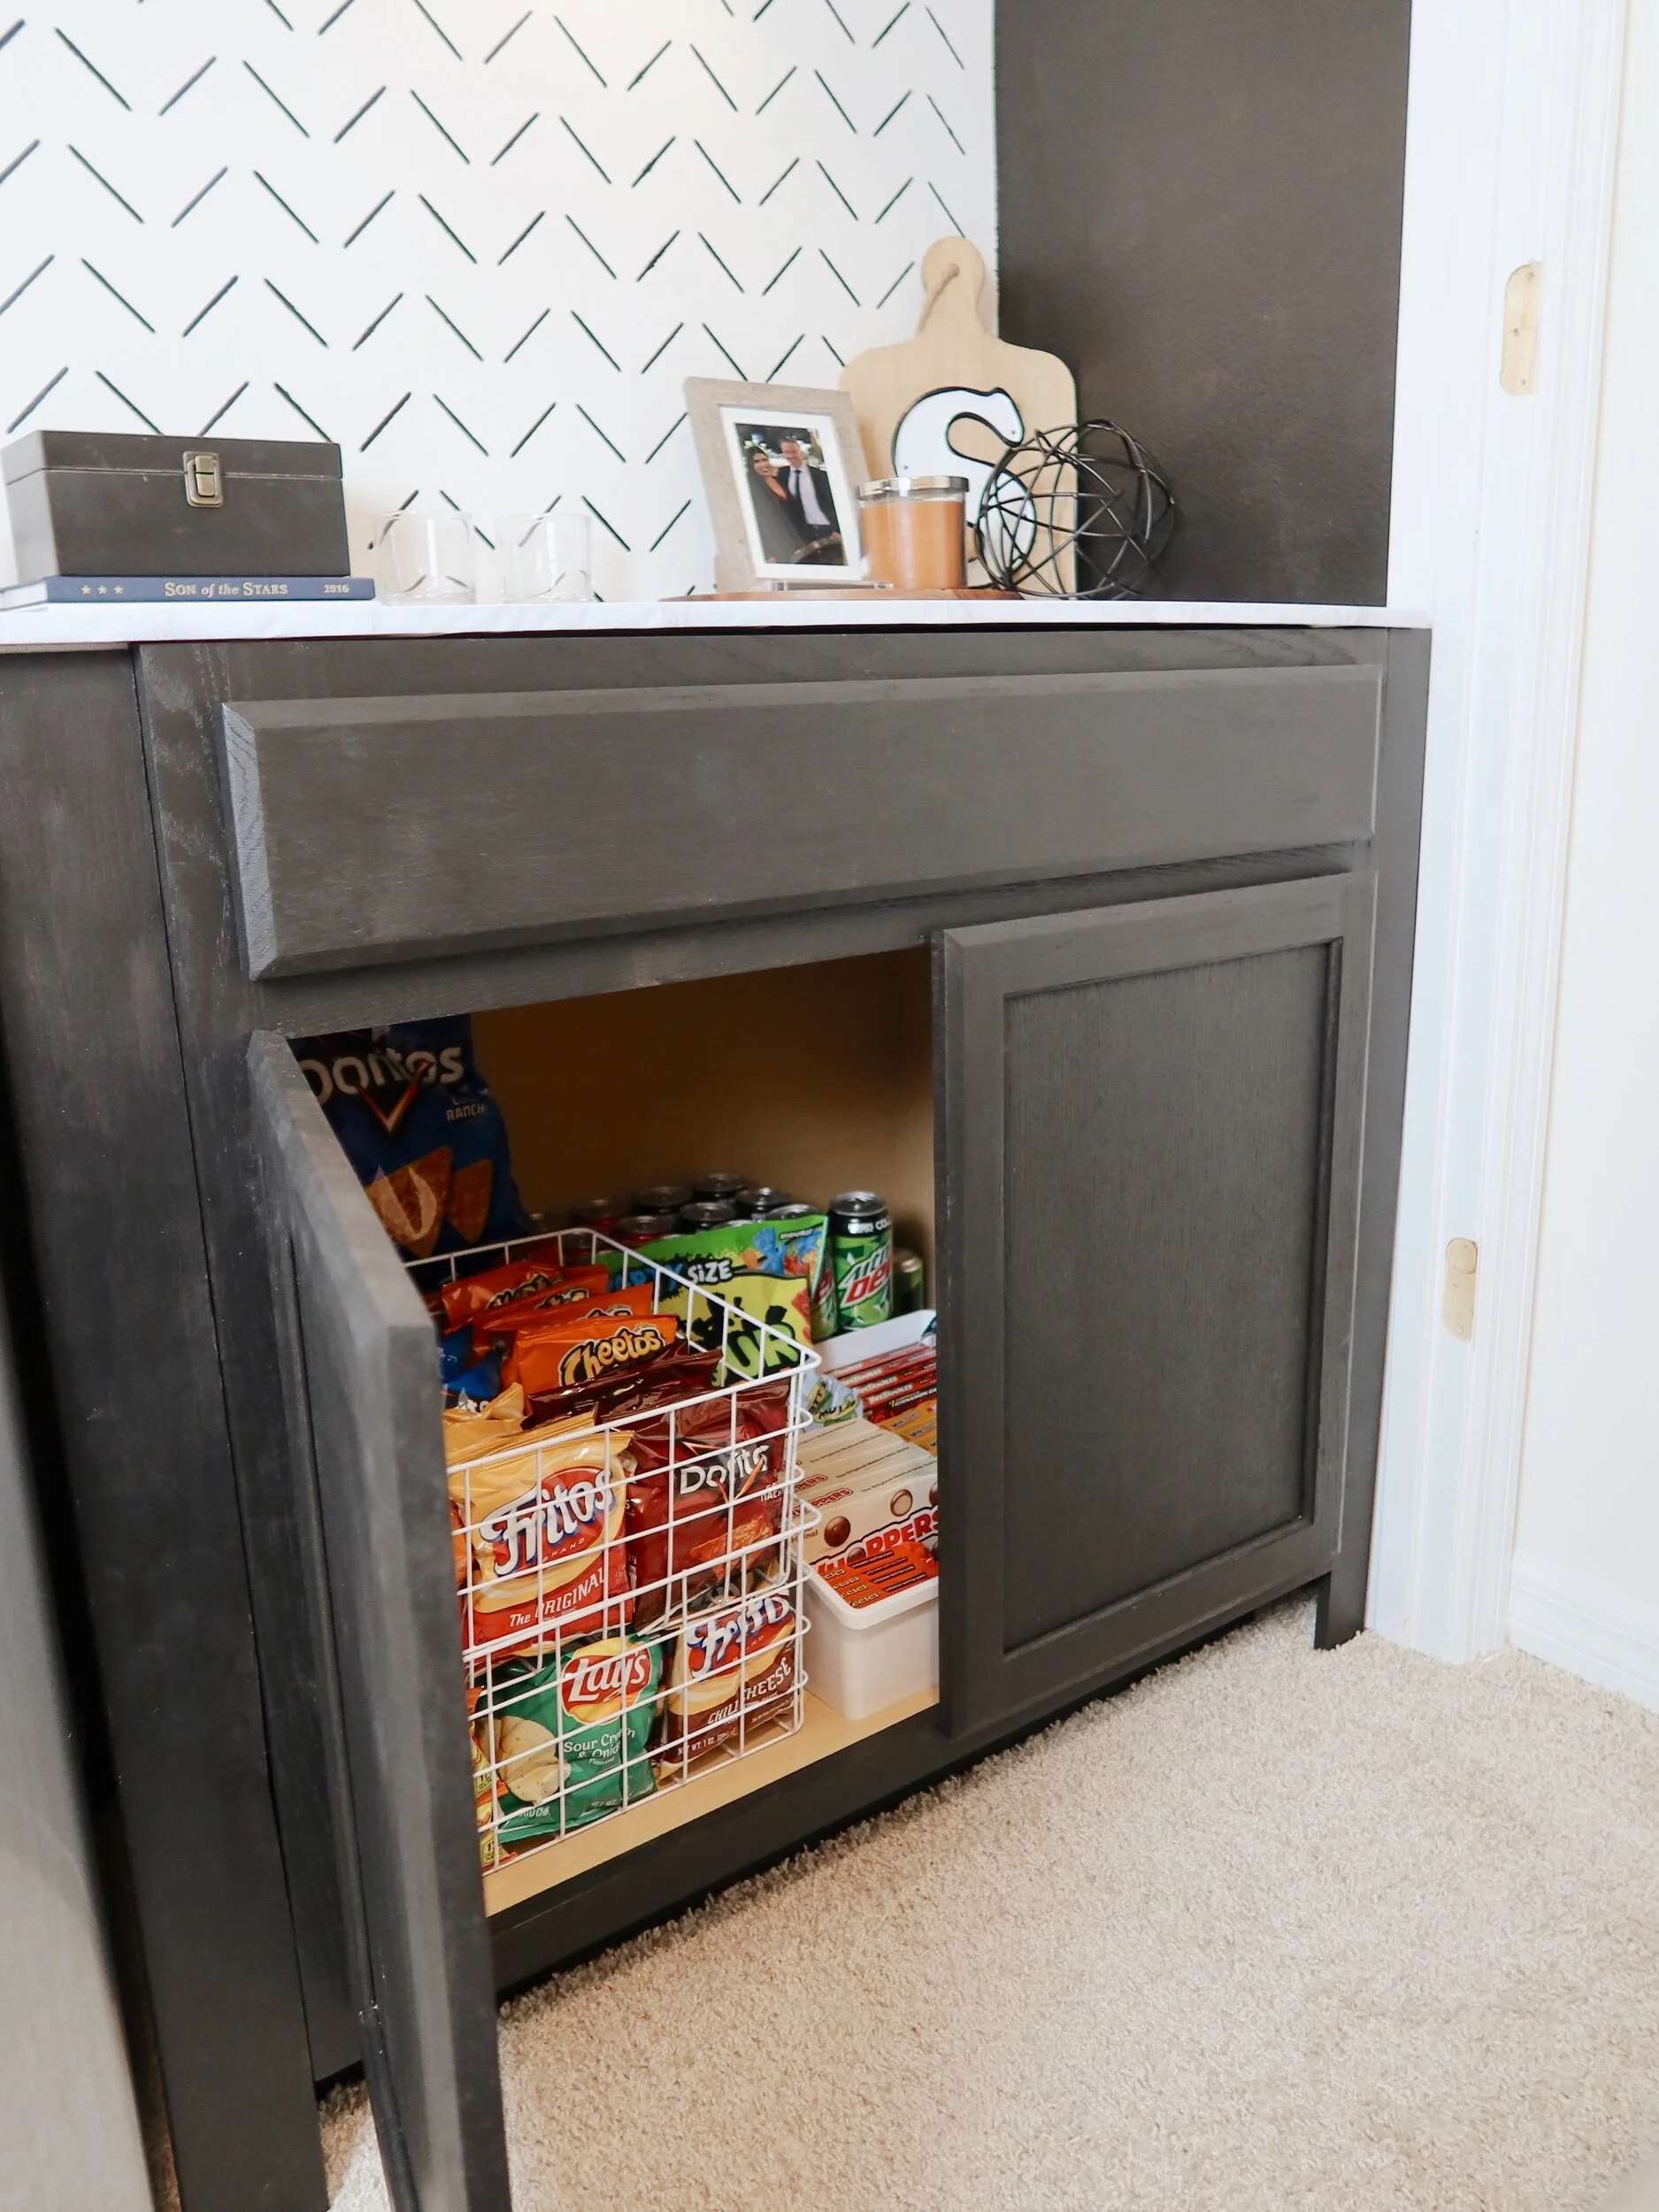
Today we’re sharing our process for creating one project in the movie room - the dry snack bar. In this, we won’t be sharing specific measurements since each persons space they’ll be working on is likely very different and measurements are moot in helping you accomplish this for yourself. We learned a lot in this project and hope you can learn from our mistakes if you decide to take on this project for your space.
SUPPLIES
Paint (1 Pint was enough for us to do the back wall, side walls and cabinets plus a few furniture flips)
Stencil (Looking back, we would have possibly opted for peel and stick wallpaper but are glad we got to flex our creative muscles)
Base Cabinet (other good options depending on your needs are this one or this one. You can also build it yourself or thrift one!)
Mini Fridge (if you’re open, keep in mind Facebook Marketplace! That’s where we found ours - half priced and never opened or used!)
MDF (for the counter in our space we only needed the one sheet and used the scraps for gaps and other projects)
Puck Lights (we only used two here + the other projects somewhere else)
PROCESS
Before getting started on the build we made a plan of what we wanted it to include. For us, we would be using the bar for both drinks and snacks so we wanted to ensure we had items that would be helpful in serving and storing those items. This meant we needed a fridge and either a cabinet on the skinnier side plus shelves or a larger cabinet. We ended up opting for a larger cabinet once we evaluated our needs (aka wanting to have storage that could go unseen).
With those items in mind, we made sure to get measurements of everything. The walls, the opening, the molding - everything. When working in an unconventional space like a closet or “built” in area, it’s important to measure (and measure again) to create as accurate of a plan as possible. Be sure to write these down, draw up or mock up the space online and keep that on hand when purchasing and sourcing your build.
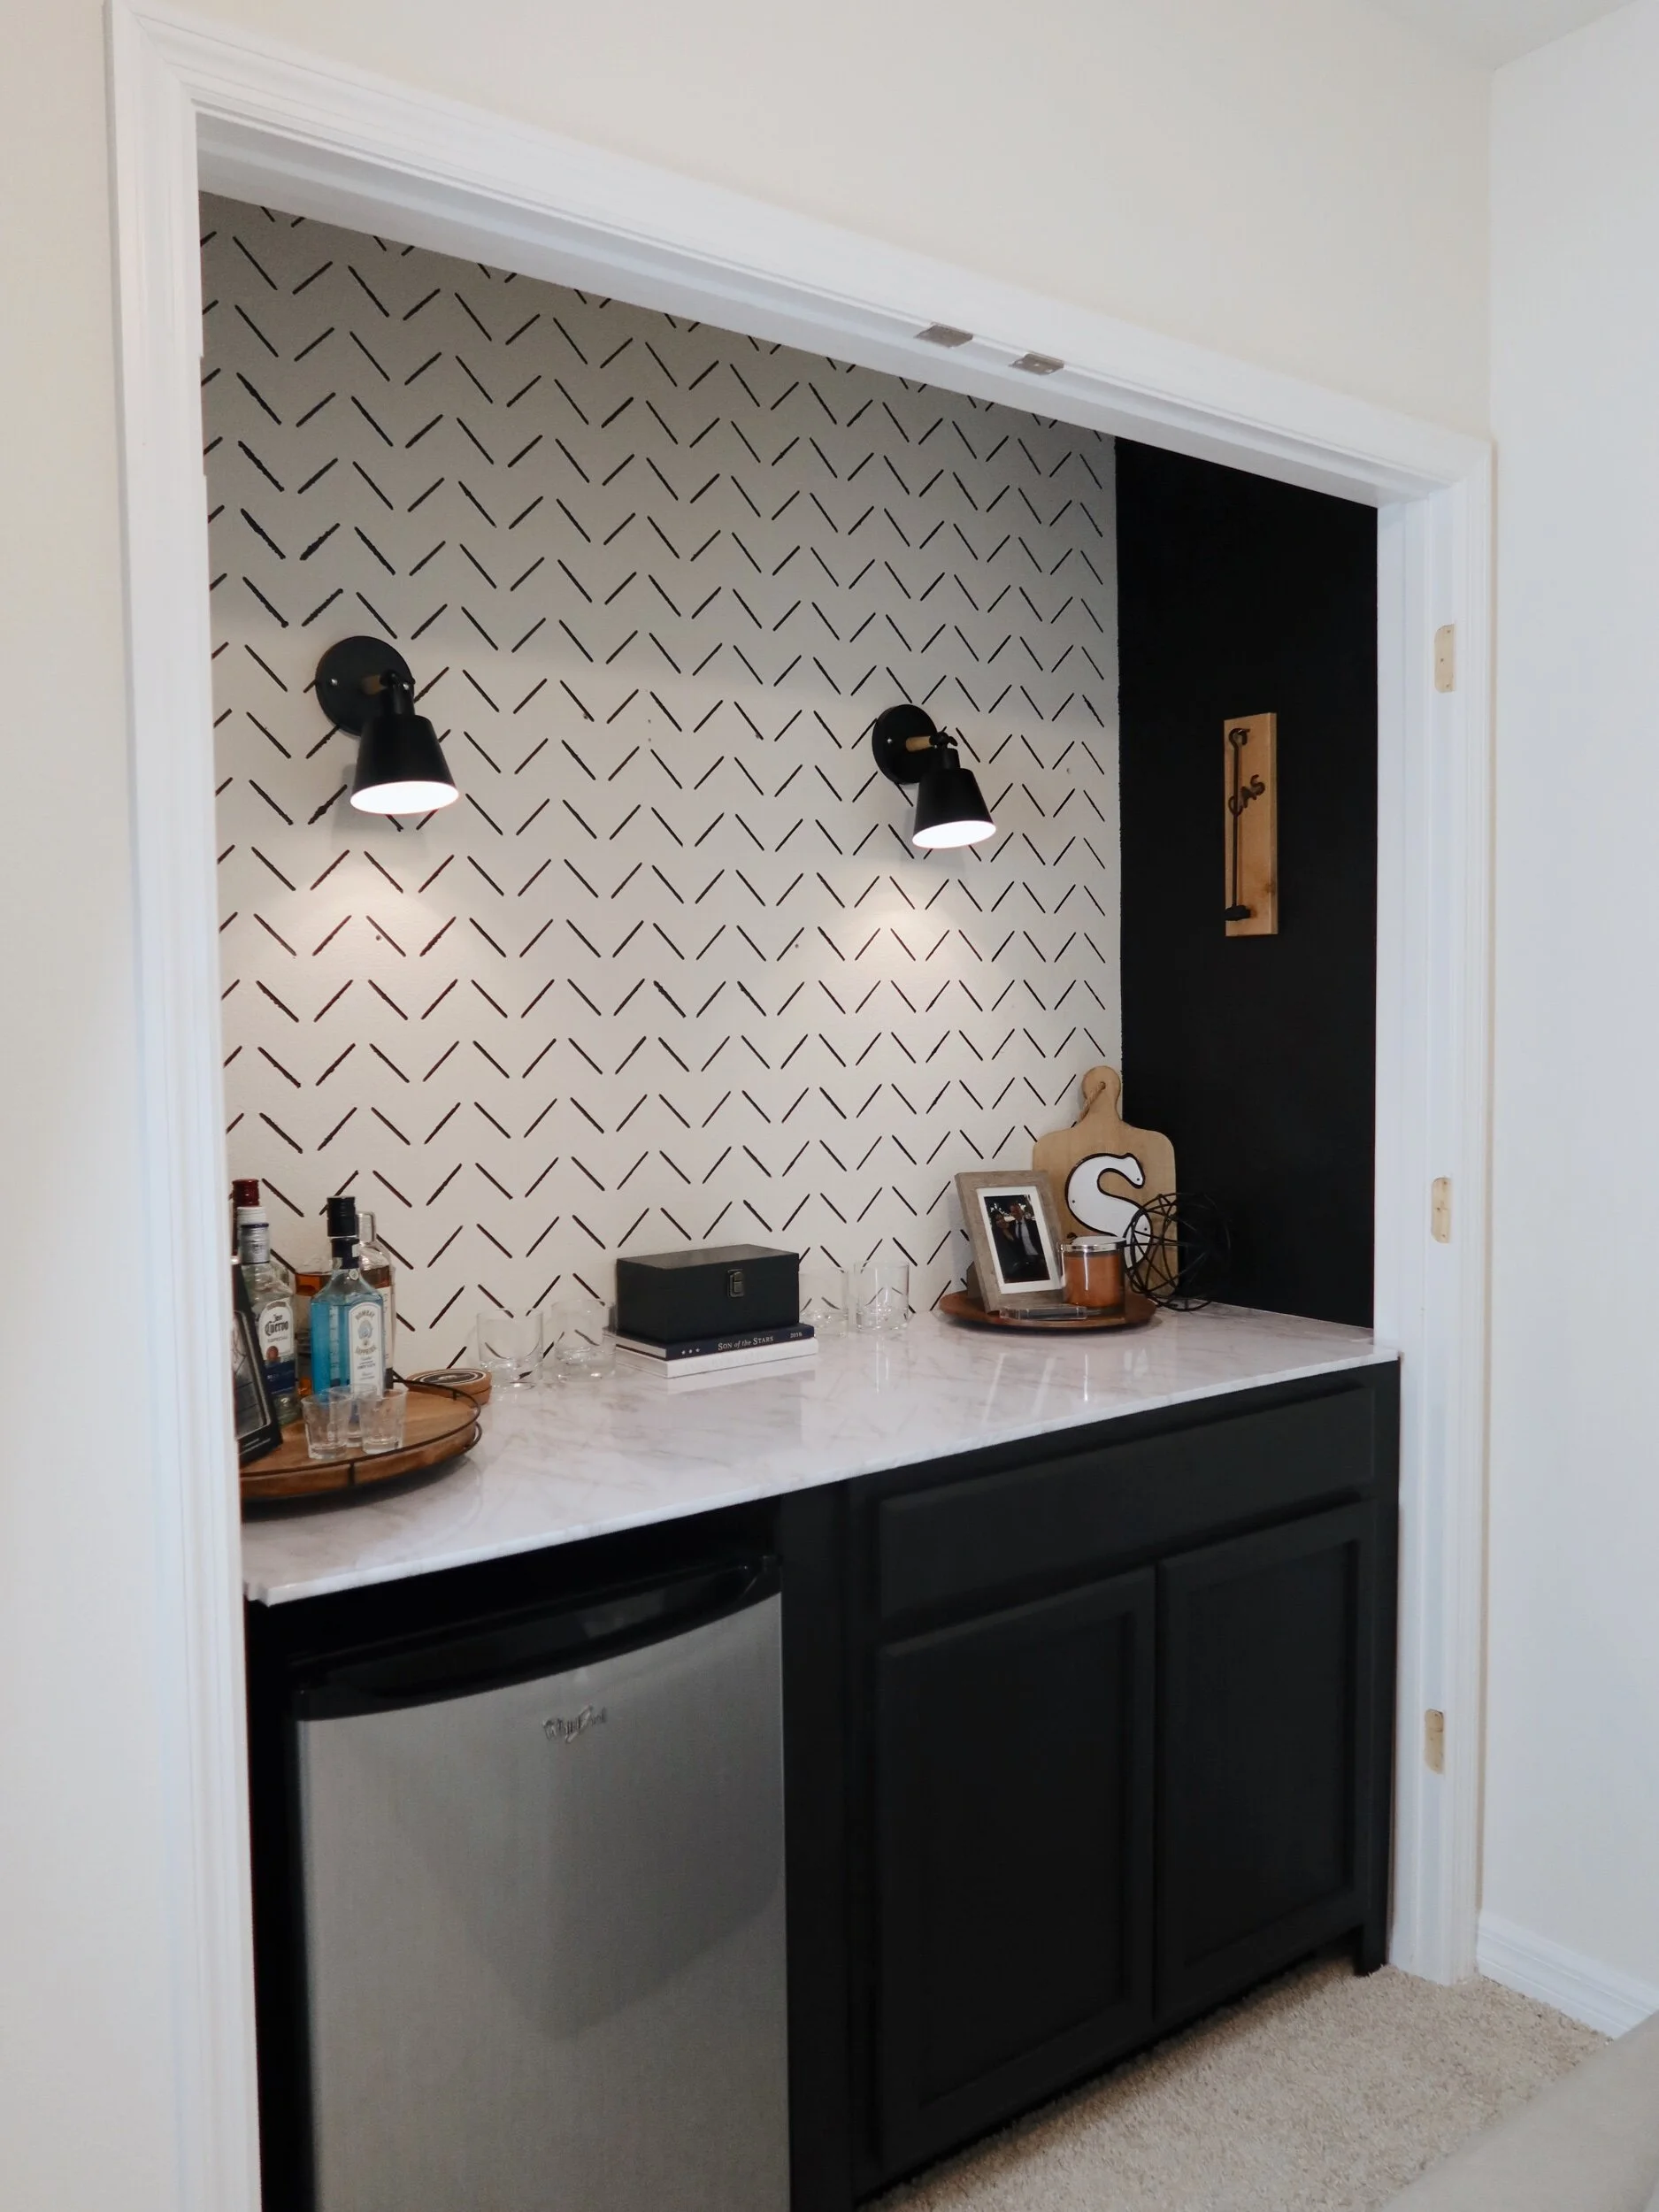
Before we even began the build, we painted. Cody wanted a darker, more masculine room so went full opposite of our typical palette and went with Blackout by Behr. Overall we’ve been really happy with this slightly warmer, rich black. Initially, we considered painting every wall but thought the back was perfect for a unique accent that could be used to tie in other elements later on. Cody found a herringbone wallpaper he liked so we went that direction, but with a stencil. Looking back, it would have been smarter to go with the peel and stick given our walls have a texture to them. We didn’t take that into consideration when painting and ended up with quite a few bleeds on both the stencil and painters tape. If you do have a more textured wall and are a stickler for clean lines, consider going with wallpaper.
Once paint was up, we added in LED light strips to the inner side of the bar. This is optional, however we wanted a few options when it came to how much light could be on given the room is small and would be used for movies - something ideally enjoyed in the dark. The strips were easy to install with their 3M backing and offer ambient lighting that is just enough to access the bar but not distract when we’re hanging out.
Once the background aspect of the bar was done, we moved on to painting our cabinet. We bought a base cabinet from Lowe’s even though we could have built it - this sped up the project and made sure we could continue to slowly develop our woodworking skills and not just butcher such an important part of our project.
Before installing the cabinet we went ahead and wired things up for the fridge. Depending on what you use, you can use a grounded extension chord or run your electric out and cover with a casing to fit in more nicely. If you have more (any) electric skills than we do, you could also potentially install another outlet. Once that was done, we went ahead and scooted in the fridge to ensure it fit in a way we were happy with. At the time, we weren’t totally sure if we wanted it on the left or right and it was much easier to move that around then put everything in and change our minds. Something we learned a lot in this project was how helpful it is to slowly live with things first before you decide. If you’re unsure about a project step or how you want something to look (and function, especially) give yourself a day or so to really sit with things before you decide. Once we did settle on the placement, we popped in the cabinet and set it so we could identify any gaps between the fridge and cabinet plus the cabinet and the wall. These would later be covered (temporarily) by measured and cut pieces of painted to match MDF.
Our MDF was cut to exact measurements of our closet. Again, we won’t be sharing these since they’re specific to us. We used both a jigsaw and a table saw but you definitely could do this with only a jigsaw. If working with only the jigsaw, be sure to mind your lines and if possible utilize something to help you with keeping the straight edges. Another tip if you’re utilizing a space like a closet is to get butcher paper or construction paper and trace out your stencil for the counter top. From our experience and research, few walls are actually straight and come with lots of “character”. Another great trick we’ve seen is using dowel rods or even extra scrap trim to glue together an outline and cut based on that. If you go this route and aren’t making this built in in a more typical space, just expect this part to be trial and error. Cut your MDF slightly larger and cut or sand it down until it’s just right. It will pay off - just keep going!
Once the countertop is cut out, go ahead and apply the peel and stick marble (or any other) contact paper. From there, you can place your counter on top and install. For us, we attached the counter directly to the base cabinet from underneath as well as installing a bracket on the wall left of the fridge. We used some scrap MDF to create a ledge of sorts and used drywall screws to ensure it would even out and hold up the counter. If you are planning on needing your counter to hold more weight be sure to install a more secure bracket.
Once installed, we measured, cut and painted scrap MDF to fill in the gaps between the fridge and cabinet and cabinet and wall to create a more flush and “built in” look. We definitely could have gone another route, however this worked well in also allowing us more access to the outlet we utilized for the fridge in the case we do need to unplug or add something.
With the counter installed, all we had left was to add on the sconces to the backsplash. We very well could have installed earlier, however, were debating between two locations/heights and wanted to see how it would all work together. We ended up going with the lights being mounted between the two locations and again, we’re thankful we waited it out before making any final decision. With the lights, they could have been wired on a switch, however we opted for the puck light hack (remote operated puck lights can be attached to lights and operate just like if they had a bulb) to save both time and money - plus allowed us to be a lot more renter friendly.
While not part of the build, we of course styled and stocked our new bar with our favorite movie snacks and drinks. This was definitely Cara’s favorite part and we’ve been enjoying it since!

Overall, this was a mostly simple build that allowed us to totally transform a space in a way that was mostly renter friendly, or at least renter friendly to the extent we were happy fixing back up when time to move out comes. Whether you’re starting out or are experienced this is definitely something worth trying out. Have questions or want to share your thoughts? Be sure to let us know in the comments below!
